With your S3 static website already up and running and your contact form already created, we first want to start with our Lambda function.
- ● Make sure your S3 bucket and Lambda function are in the same region.
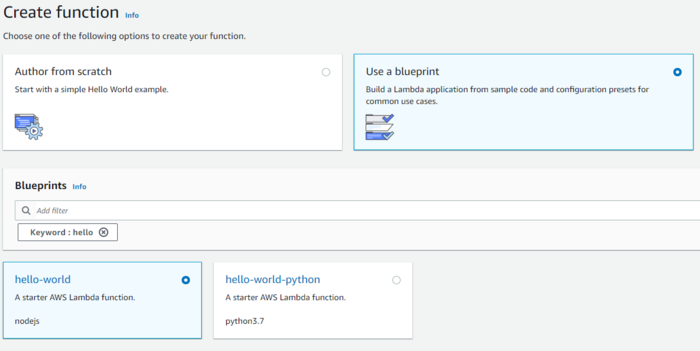
- ● Click on Create function.
- ● Click on Use a blueprint.
- ● Type in hello in the search bar.
- ● Select the first option: hello-world using nodejs.
- ● Click on Configure on the bottom right.
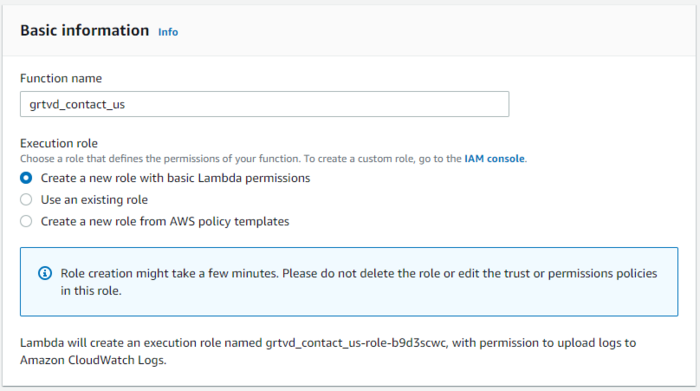
Under Basic Information type in a function name you would like to use and select Create a new role with basic Lambda permissions, we’re going to modify that later. Click on Create function.
On the following screen, go ahead and copy and paste this function into your Function Code:
var AWS = require('aws-sdk');
var ses = new AWS.SES();
var RECEIVER = 'ADD YOUR EMAIL';
var SENDER = 'ADD YOUR EMAIL';
var response = {
"isBase64Encoded": false,
"headers": { 'Content-Type': 'application/json', 'Access-Control-Allow-Origin': '*'},
"statusCode": 200,
"body": "{\"result\": \"Success.\"}"
};
exports.handler = function (event, context) {
console.log('Received event:', event);
sendEmail(event, function (err, data) {
context.done(err, null);
});
};
function sendEmail (event, done) {
    var params = {
        Destination: {
            ToAddresses: [
                RECEIVER
            ]
        },
        Message: {
            Body: {
                Text: {
                    Data: 'name: ' + event.name + '\nphone: ' + event.phone + '\nemail: ' + event.email + '\ndesc: ' + event.desc,
                    Charset: 'UTF-8'
                }
            },
            Subject: {
                Data: 'ADD A SUBJECT NAME: ' + event.name,
                Charset: 'UTF-8'
            }
         },
         Source: SENDER
    };
    ses.sendEmail(params, done);
}
When copying and pasting the format, it should automatically set itself up, but just in case this is how it should look like:
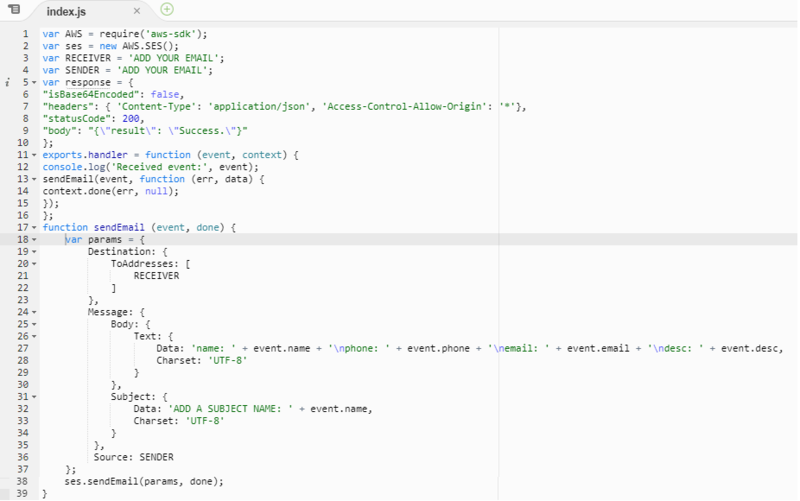
On lines 3 and 4, insert the email addresses you want to use for sending and receiving inquiries from your contact form, you can add the same email, it doesn’t matter. Also, on line 32, add a subject you would like to use when receiving emails. Save the function, but before testing it, we must do a couple of things beforehand:
Head to the SES Management Console:
- ● Click on Email Addresses.
- ● Click on Verify a New Email Address.
- ● Type in the email address you would like to use to receive the inquiries.
- ● You should receive an email from AWS asking you to verify the email; please do so.
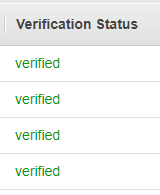
- ● The status should say verified after a few minutes.
Now we need to set up our Role properly; please head to the IAM Management Console:
- ● Click on Roles.
- ● Click on the newly created role. It should have the Function Name from before plus some numbers and letters attached to it.
- ● The role should already have a policy attached to it, which is fine.
- ● Click on Attach Policies.
- ● In the search bar, let’s type in SES and add a checkmark to AmazonSESFullAccess.
- ● Again, the search bar let’s type in LambdaExecute and add a checkmark to AWSLambdaExecute.
- ● Click on Attach policy at the bottom.
- ● Now, we have three policies attached to this role.

Let’s head to our Lambda function and click on the Test button, and it should come back as succeeded.
The next step is to set up your API Gateway.
- ● Click on Create API.
- ● Under REST API, click on Build.
- ● Under Choose the protocol, make sure REST is selected.
- ● Under Create new API, make sure New API is selected.
- ● Under Settings, add an API name you would like to use.
- ● Click on Create API.
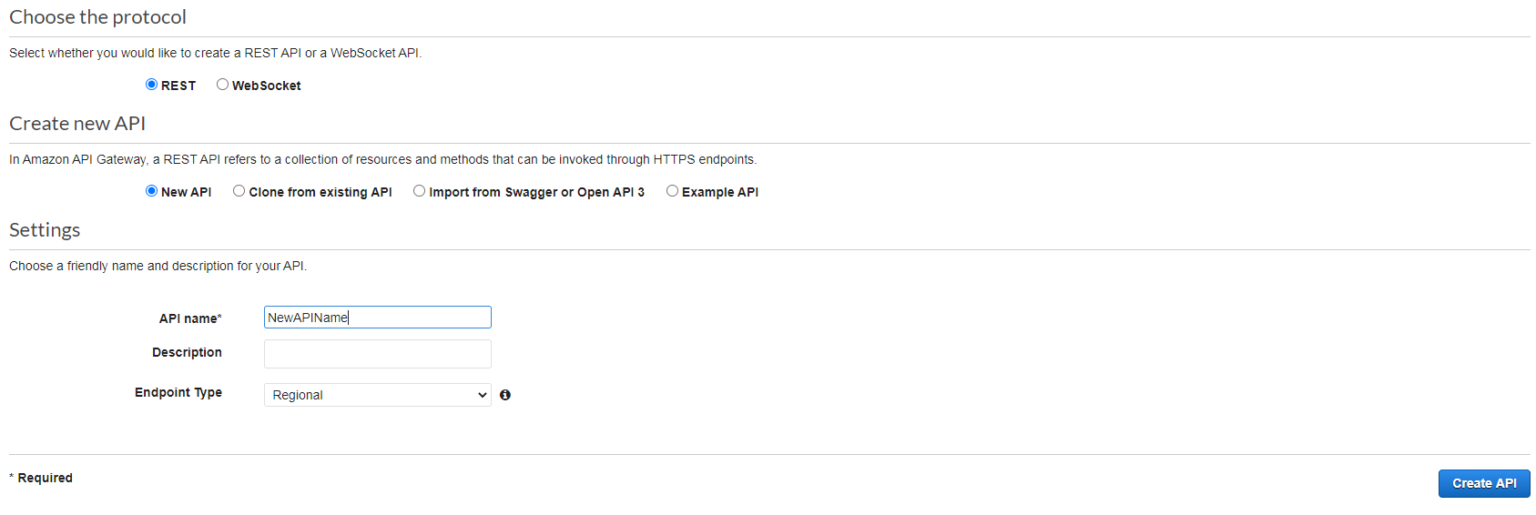
Once we have our new API created, we want to create our Resource, Method, Stage, and deploy our function. We’re almost to the finish line.
- ● Click on Actions.
- ● In the drop-down menu, select Create Resource.
- ● Under Resource Name, enter a name you would like to use.
- ● Add a checkmark to Enable API Gateway CORS.
- ● Once created, select your resource and click on Actions and select Create Method.
- ● Select POST and then click on the checkmark right next to it to confirm.
- ● For the Integration type, make sure Lambda Function is selected.
- ● For Use Lambda Proxy integration, leave that unchecked.
- ● Make sure the Lambda Region is where you had created the function.
- ● For Lambda Function type in the name of your Lambda function, a drop-down menu should appear if you type one letter, and select the correct Lambda function you want to use.
- ● For Use Default Timeout, leave it checked.
- ● Click on Save.
- ● Click Ok.
After all that your screen should look similar to this:
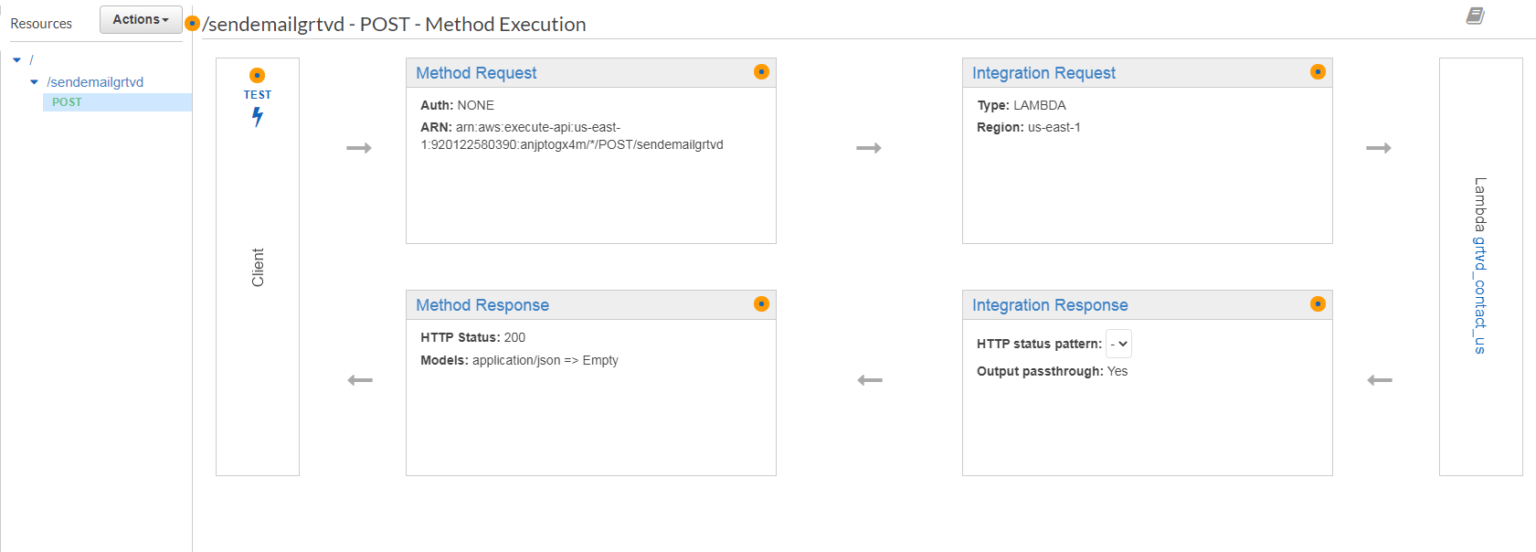
Once this is ready, we need to enable CORS, and with this, we can bring your Contact Form and your S3 static website together.
- ● Click on Actions.
- ● Click on Enable CORS.
- ● Leave the top 4 options as is, and for Access-Control-Allow-Origin*, leave it with the Astrix, leave it as is. IMPORTANT!
- ● Click on Enable CORS and replace existing CORS headers.
- ● Once that is done click on Actions
- ● Click on Deploy API.
- ● In the new window that appears under Deployment State, select [New Stage].
- ● I usually use prod for Stage Name.
- ● Then click on Deploy.
- ● We will be sent to the Stages tab automatically.
- ● Click on POST, and on the right side of your screen, you will see your Invoke URL. Please keep that in a secure place to get to; we’re going to need that soon.
After all this, we’re finished with the AWS side of things. Now we need to do some coding. In your HTML file we have to do the following:
Please don’t make the same mistake I did; I added the following script between the , you don’t want to do that. Add this code between the
and .<script>
function submitToAPI(e) {
e.preventDefault();
// var URL = "API Gateway";
var name = document.getElementById("name-input").value;
var phone = document.getElementById("phone-input").value;
var email = document.getElementById("email-input").value;
var desc = document.getElementById("description-input").value;
if (name=="" || phone=="" || email=="" || desc=="")
{
alert("Please Fill All Required Field");
return false;
}
nameRE = /^[A-Z]{1}[a-z]{2,20}[ ]{1}[A-Z]{1}[a-z]{2,20}/;
if(!nameRE.test(name)) {
alert("Name entered, is not valid");
return false;
}
phoneRE = /^([0|\+[0-9]{1,5})?([7-9][0-9]{9})$/;
if(!phoneRE.test(phone)) {
alert("Phone number entered, is not valid");
return false;
}
emailRE = /^\w+([\.-]?\w+)*@\w+([\.-]?\w+)*(\.\w{2,3})+$/;
if(!emailRE.test(email)) {
alert("Email Address entered, is not valid");
return false;
}
var data = {
name : name,
phone : phone,
email : email,
desc : desc
};
var xmlhttp = new XMLHttpRequest();
xmlhttp.open("POST", "NEED TO ADD YOUR API INVOKE URL HERE");
xmlhttp.setRequestHeader("Content-Type", "application/json");
xmlhttp.send(JSON.stringify(data));
xmlhttp.onreadystatechange = function() {
if (xmlhttp.readyState === 4) {
var response = JSON.parse(xmlhttp.responseText);
if (xmlhttp.status === 200 ) {
console.log('successful');
document.getElementById("contact-form").innerHTML = "<h1><center>ADD A THANK YOU MESSAGE HERE!</center></h1>";
} else {
console.log('failed');
}
}
}
document.getElementById('contact-form').reset();
}
</script>
I wouldn’t suggest editing anything there or even adding additional lines, but if it’s necessary to go ahead and follow the template. As you can see above, there are a few sections that are in bold, follow those steps, and now we have one more thing to do, and that’s adding some additional code to your contact form section. If you haven’t created it just yet, then that’s fine, the following will create it for you, all you have to do is adjust the style if you want to.
<div class="w3-light-grey w3-padding-large w3-padding-32 w3-margin-top" id="contact">
  <h3 class="w3-center">CONTACT US</h3>
  <p class="w3-center w3-large">For any requests or comments that you may have, please send us an email or call in:
  <br><br>
  <i class="fa fa-phone fa-fw w3-xxlarge w3-margin-center"></i>ADD PHONE HERE</p>
  <p><p class="w3-center w3-large"><i class="fa fa-map-marker fa-fw w3-xxlarge w3-margin-center"></i>LOCATION</p></p>
  <div style="margin-top:48px">
<form id="contact-form" method="post">
      <input type="text" class="w3-input w3-border" id="name-input" placeholder="Name" class="form-control" style="width:100%;" /><br/>
      <input type="phone" class="w3-input w3-border" id="phone-input" placeholder="Phone" class="form-control" style="width:100%;"/><br/>
      <input type="email" class="w3-input w3-border" id="email-input" placeholder="Email" class="form-control" style="width:100%;"/><br/>
      <textarea id="description-input" rows="3" placeholder="Message" class="form-control" style="width:100%;"></textarea><br/>
      <div class="g-recaptcha" data-sitekey="ADD YOUR RECAPTCHA CODE HERE" class="form-control" style="width:100%;"></div>
      <button type="button" onClick="submitToAPI(event)" class="w3-button w3-black" style="margin-top:20px;"><i class="fa fa-paper-plane"></i> SEND</button>
</form>
  </div>
</div>
If you edit the codings from above, make sure the id=” “ in the contact form matches in the script AND in the Lambda function. There are a couple of sections you do have to edit, like the phone number and location, if you do decide to keep that. If everything goes well, your Contact form should look like the following:

After testing the contact form, you should get the thank you for your message display:

Once you receive your “Thank You” message and only then will you know that everything is working fine. I know this is a long blog post, but it was tough for me to find something accurate and functional, I wanted to make this post as detailed as possible for you to avoid any frustration. If you have any questions, please let me know in the comments below or email me: steven.b.umana@gmail.com. Thank you so much for your time, and I hope you have a great rest of your day! Please click here to return to my site, or if you would like to read more information on contact forms for your S3 static website
Source: https://stevenbumana.com/aws-s3-website-serverless-contact-form/


